So I went up to Edinburgh this year for Edinburgh Yarn Festival and 3 very surprising things happened.
- I didn’t buy very much yarn (a trifling one sweater’s worth!)
- My trusty Cath Kidston handbag started to disintegrate on me. Yep it chose that weekend to spring 4 holes in each of the bag base corners and for the zip to sporadically undo itself from the wrong end, announcing that the countdown to its self destruction had begun.
- After spending 3 days trying to choose a replacement bag amongst the many beautiful Harris Tweed options I realised I didn’t like the quality of any of them!
To put that last revelation into context, I’m the least fussed about bags person you’ve ever met. I only ever have one bag at a time, which I’m loyal to until it’s time to go to bag heaven and all I ask in return is that it puts up with me ramming my kindle, wallet, knitting, keys, sanitary products and the rest of my life into it. The actual quality of the bag has never previously factored into my purchasing considerations.
But that was before I caught the sewing bug. The new me apparently analyses the topstitching and the plaid matching and says things like “I could have done that better”.
You can see where this is going can’t you?
For the record, it turns out that on your very first bag making try you probably can’t do the stitching better. But the plaid matching was nailed at least. Smug face.
So one memorable night in the Premier Inn off Cannongate, I did my best Google Fu and discovered the spiritual home of wannabe bag makers that is Swoon Patterns. My heart filled eyes immediately fell on the Carter Messenger Bag as being the bag I never even knew I’d dreamed of. The very next day, I dragged my mum back to Edinburgh Fabrics (yes we’d naturally already visited having been in the city a whole 72 hours) where I made up for my thriftiness at the yarn festival by spending lots on tweed fabrics instead. Well it’s all wool at the end of the day isn’t it?
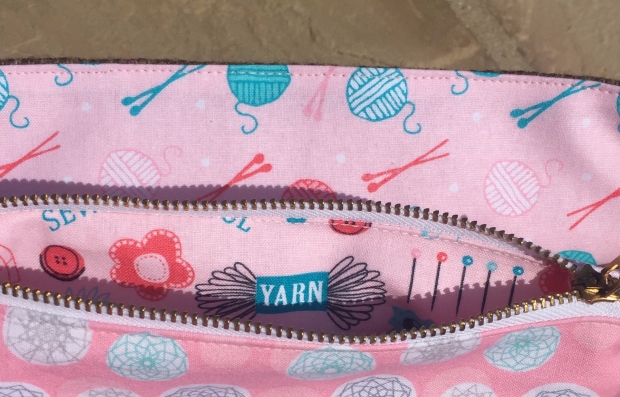
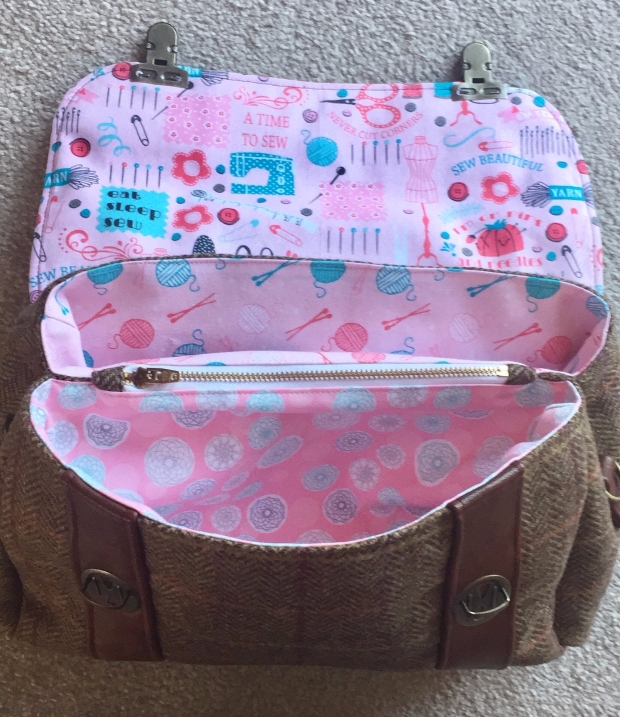
Just in case I forget what my hobbies are, the inside of the bag will remind me!
More googling got me to the Bobbin Girl Bag Making website where I easily picked up all the interfacings and hardware my bag of tweedy dreams would need. For the bag lining I was pretty confident my stuffed drawer of Sew Hayley Jane fat quarters would provide and sure enough I swiftly fished out 3 coordinating pink fat quarters – enough for each of the 3 inner pockets. Always trust the stash!
The final supply to be sourced was the contrast fabric and the pattern was written for vinyl, however after 30 years of a leather working hobby, my father has a mound of offcuts that frankly rivals my fabric hoard. So I raided his workshop in much the same manner as I raid my parents fridge every time I visit and came away with an arm full of tanned treasure.
Due to being remnants, the leather is a mismatch of different thicknesses, shades and states of distress, but as my stitching is also of dubious consistency I’m calling the whole effect “rustic charm” and rocking it.
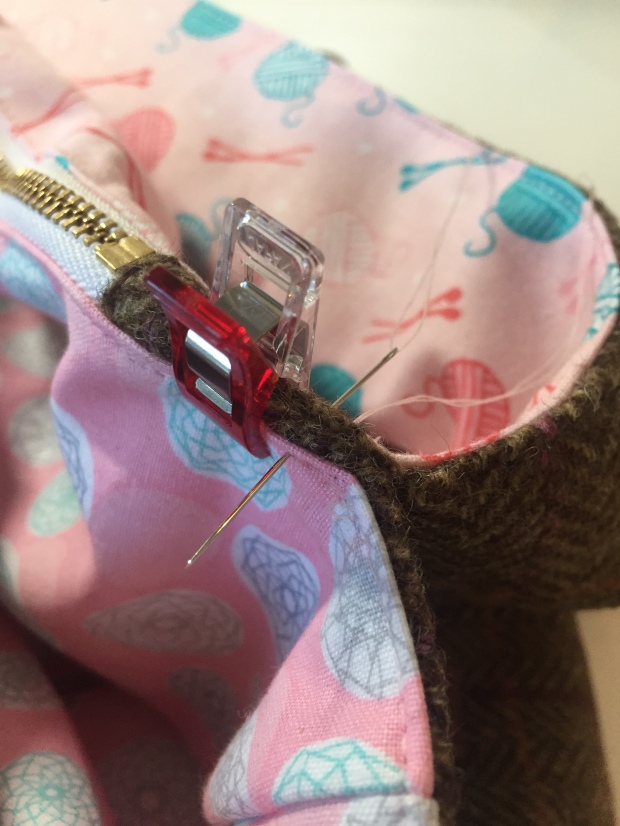
I knew I’d be sewing through a lot of layers so popped a jeans needle into my machine and used that throughout. I wasn’t sure how my trusty Janome DKS100 would cope with multiple thicknesses of leather but it was an absolute star! The only thing it didn’t like was me going too fast, so I dropped the speed to the slowest setting to let it think about each stitch. The other technique that really helped was rather forcefully guiding it, something completely counter intuitive after all the knits and sheer fabrics I’ve been sewing where you handle as little as possible, but with the trickier parts of the bag I found it best to have one firm hand feeding it into the needle and the other almost pulling it through on the other side.
I also experimented with different feet and threads on a scrap of double folded leather – all the reviews seem to recommend using a walking foot but I found I got the best results with my plain old standard presser foot and my usual gutermann thread. Top stitching thread wouldn’t catch at all, I just ended up with a load of holes in my leather and no thread in them. Which is a shame as I love the look of visible stitching on leather, so instead went over my stitching lines a couple of times to reinforce the stitches.
Of course, at no point did it occur to me to do the sensible thing and ask my Dad either for tips or the use of his heavy duty specially designed for leather sewing machine. Good grief no, who wants to make things too easy for yourself?!
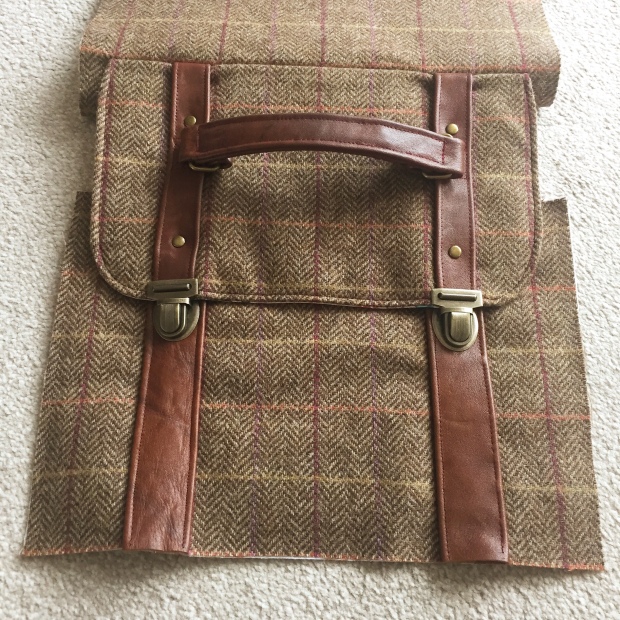
There will be a shoulder strap, just as soon as I’ve raided the workshop again and found an offcut long enough!
Although the bag construction had a lot of steps, nothing was overly complicated for your average sewist as the techniques used largely consisted of all the different ways you can sew a straight stitch. The only part I did struggle with was sewing into tricky corner parts as I just couldn’t seem to get in close enough. A couple of times I ended up switching to a hand needle to finish things off. How do other people do it – do you have special feet that let you start and stop closer into corners?
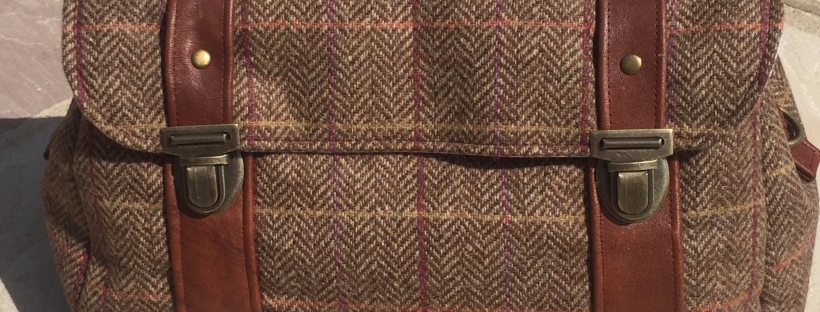
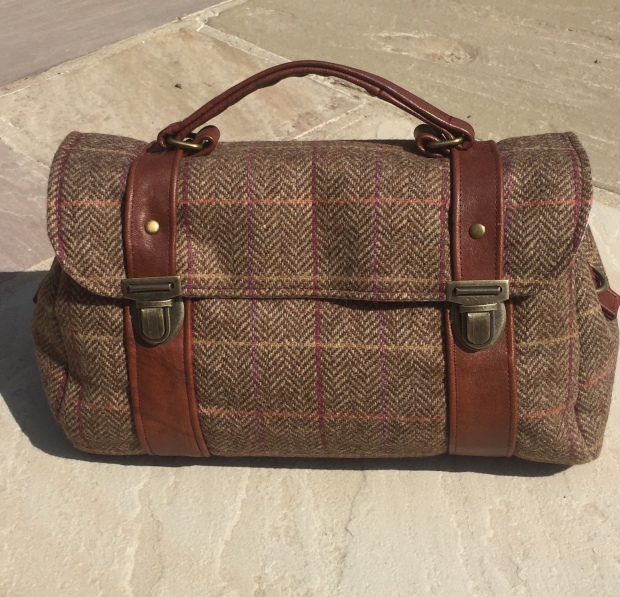
I discovered whilst making jeans that I get a real kick out of using DIY tools in my sewing adventures, so was thrilled at the amount I got to play with my awl, hammer and pliers on this project. Those of you familiar with the pattern may have spotted the additional rivets on the closure straps, they’re there for no other reason than because I love putting rivets on things and wasn’t ready to stop at a mere two.
Installing tongue locks (or press locks depending on your country of origin) was a new trick for me, so naturally I made it harder for myself by modifying the pattern at the same time. The closure straps in the original pattern piece extend down past the flap and are secured by little holders at the bottom on the bag and the tongue locks are hidden beneath them, but I wasn’t keen on the idea of fiddling with the long straps plus I wanted all the antique brass hardware visible. So I chopped the straps off at the end of the flap and installed the tongue lock on top. This meant I had to be quite precise with the width of the straps as the prongs of the male part of the lock needed to sit either side of each strap. That caused a few unpickings and resews!
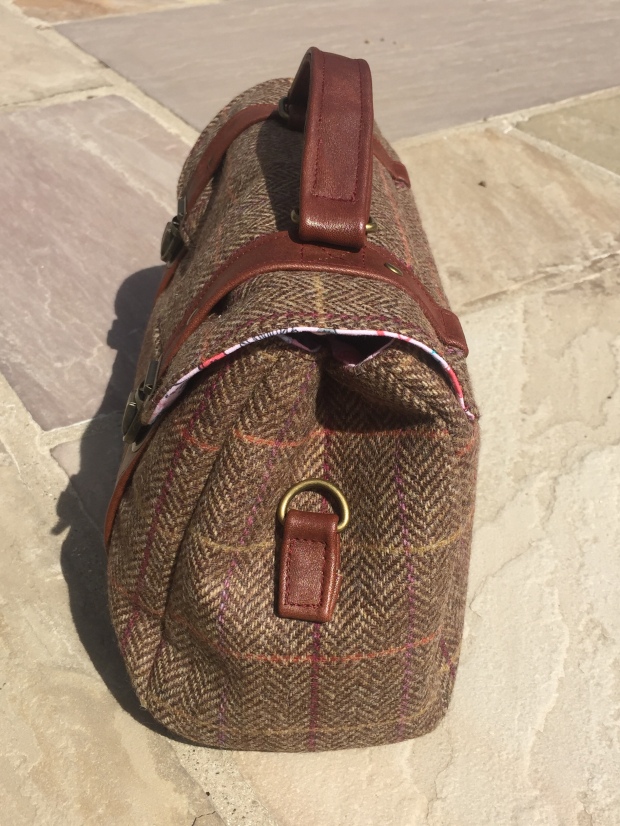
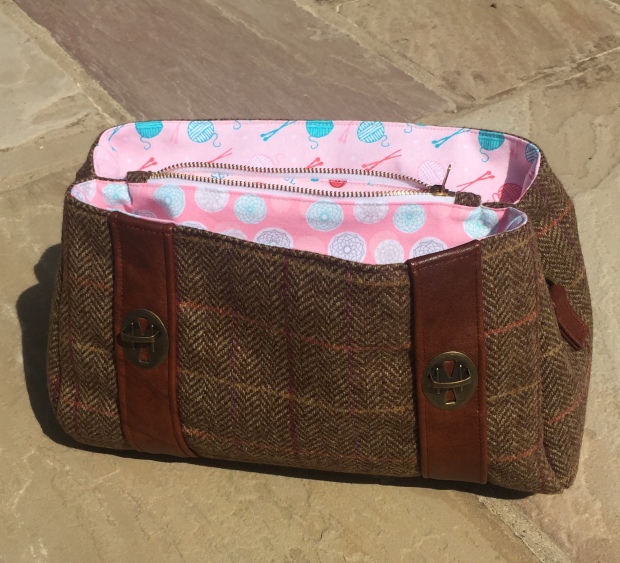
As the bag started to near completion I started to have a few worries that it was looking quite small, but having since transferred all my life’s essentials into it I’d say it’s pretty much perfectly sized. It contains a small mountain of flaws, but despite them all I’m insanely in love with it. I’m unlikely to turn into an addicted bag maker now (frankly I have enough hobbies and my dressmaking and knitting wishlist will keep me going for the next 5 years at least) but I will probably make, rather than buy, any future bags I happen to need.
I’m already thinking about a laptop case, a sandwich bag to take my lunch to work in, a yoga mat bag and perhaps even a new kindle cover in matching tweed to my handbag…. 🙂
Thanks for reading!
Shelley

It looks amazing. I liken bag making to child birth: it’s painful and frustrating at the time, but you soon forget and want to make another!
LikeLiked by 1 person
Your post was do funny read and I am on my way as well. Got a pattern and going to go with heavy linen. Thank you for posting your journey. Love the past that your Mum is with you.
LikeLike