I’ve got to be honest, I was a bit dubious when this indigo shibori stretch cotton turned up in my SewHayleyJane subscription box. Normally new fabric and I have a moment of communing with each other and I get an idea of what it might eventually become, but this just wasn’t singing at all, not even drunken karaoke at the end of a work curry night type singing. So I dutifully washed it and shoved it in the stash thinking it might at least do for a toile, but what a waste of that months subscription.
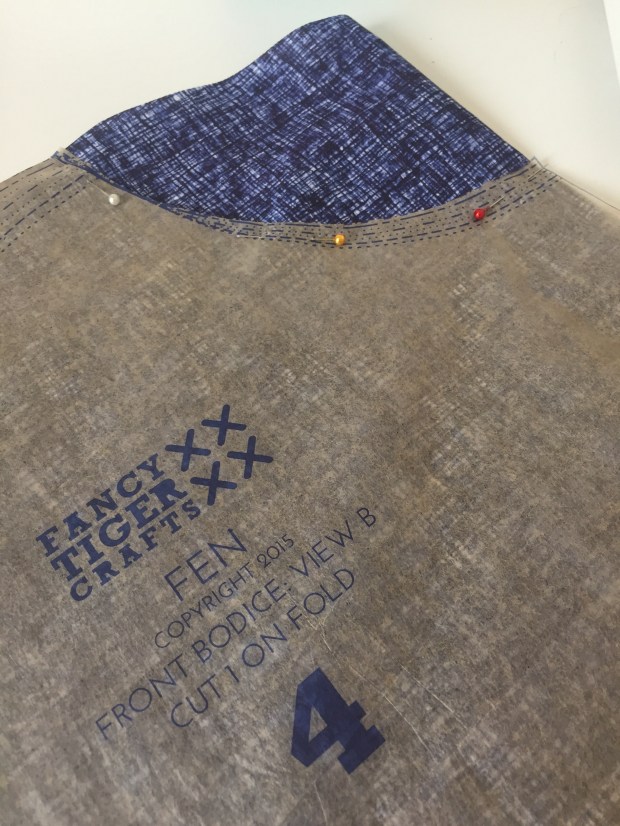
But after 4 months gestation in the stash box something utterly wonderful happened, I discovered the Fancy Tiger Crafts Fen dress! My eye got caught by a stunning flannel version with a mustard hand knit cardigan and I immediately wanted to steal that Instagrammers outfit right off her back.
But you get arrested for that sort of thing over here so I settled for ordering the pattern and stash diving for what to make it with. I knew I had a few flannels to play copycat with but this time learnt from my lesson with the Bruyere shirt about not committing to the extreme sport of plaid matching on your first run go at a new make. And then I pulled the indigo fabric out from the box and stared at it until it finally sung Hallelujah.
Yup basically this fabric was born to marry this pattern and I’m super smug at my genius in playing matchmaker to them. It’s the ultimate throw on dress and with thick tights, clumpy shoes, cardigan and a woolly scarf has everybody else wishing they felt as cosy as you look.
One word of warning – whilst the dress doesn’t use a lot of fabric, most of what it does is cut on the fold. And the pattern pieces are super wide things that get narrowed later by magic (well ok darts and gathers) so if your fabric has a very narrow width like mine did you’ll end up with a long unused strip and it could be quite wasteful. I had 3 metres of the indigo so am still hopeful there’ll be a second Prince Charming pattern for the remnant, but it/he will have to be a slim fit!
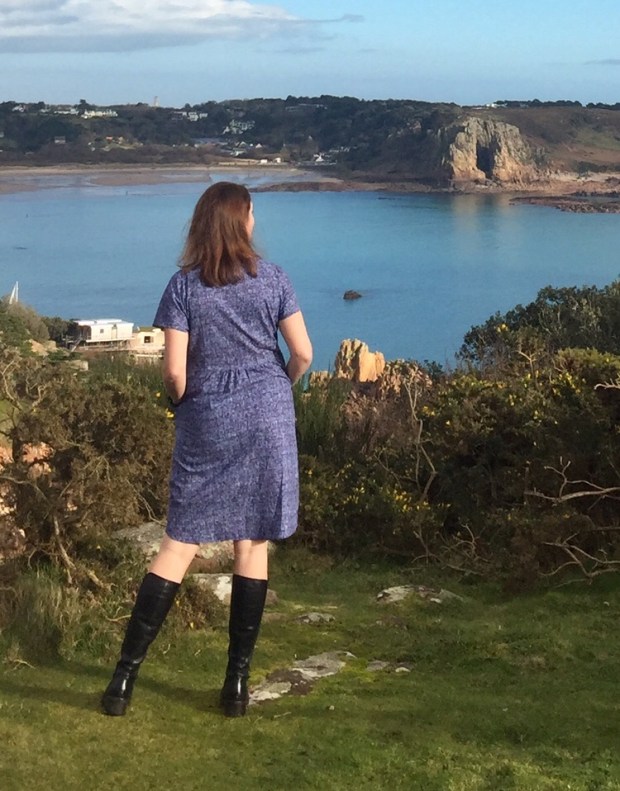
I went for a straight size 12. Normally I have to grade out the waist to a bigger size than my hips and bust, but the boxy nature of the dress meant I got away without that for once. (Edit: the dress later shrunk in the wash owing to my failure to prewash the fabric and I like the shrunken version better so will be going down a size next time. The pics are all post the laundry resize) My usual short back did raise its um head making the hi-low even more pronounced and I think it shows in the rear view so I’ll take an inch off the bottom of the back bodice on future versions. (Spoiler: yes I liked it enough to make another!)

The construction of the dress was amazingly quick and easy, after the pieces were cut I basically sewed it in 3 evenings (and not even late night ones!). As ever I finished everything on my overlocker.
Everything except the neckline that is. The pattern has you finishing both the neckband edges and the bodice neckline with a zigzag before you sew them together. This is necessary because there is only a 1/4 inch seam allowance on the neckband. The pattern gives marvellous instructions for stretching and fitting the neckband so it has a marvellous clean finish but I’ve got to be honest, since starting my passionate relationship with Ollie the overlocker I’ve turned into a finishing snob and gone right off zigzagged edges. Next time I might stitch it unfinished and then try and overlock it anyway, I think it should just be doable. Although to be fair the pattern also gives instructions for finishing it using a twin needle which is something I never tried and probably about time I had a go at.

I used my 6mm rolled hem foot for the sleeve and dress hems. Have I mentioned how much I love rolled hem feet? I absolutely detest double folding hems (I’m pathologically incapable of doing one without burning my fingers on the iron) so the discovery of this foot just rocked my world. It’s a little fiddly to get going with but I’ve got the hang now of securing the hem with a pin, doing the first 2 stitches with the fabric underneath the foot, then lifting the foot and feeding the fabric into the spiral. Then the magic happens! The fabric was bordering on a little too heavy for the 6mm foot but I shoved it through anyway. I def need to investigate whether they come in any bigger sizes!
But then after all this joyful making we hit a huge sour note (I appear to be stuck on musical metaphors this blog) in the form of me trying it on and facing the mirror. The pattern runs very true to size so no issues there but oh dear I looked completely square between the shoulders and the waist!! I could just hear my mum’s comments on how “that dress does nothing for you” (anybody else have their mums imaginary voice analysing their fitting issues?) and knew I couldn’t go out in public like that.
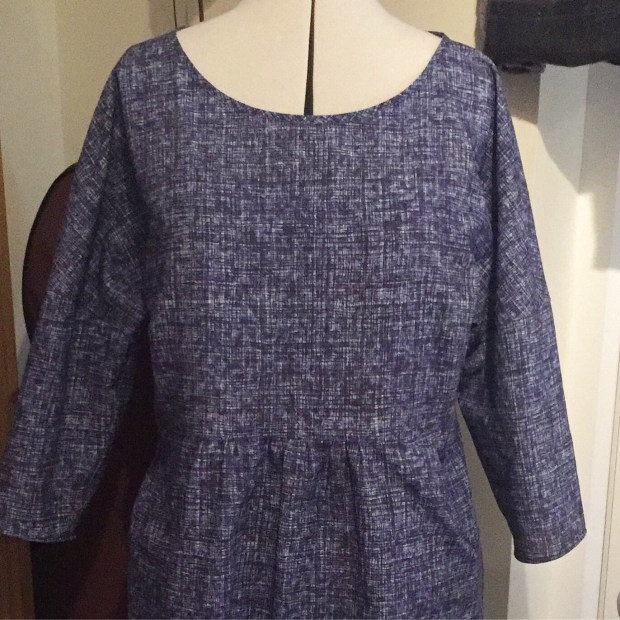
Returning to Instagram and the tag #fendress to see if anyone else had had this problem, I found that very few people had bothered with the sleeve extensions and those that did had used drapier fabric than mine. So I girded my loins and chopped off the sleeves and rehemmed the now short kimono sleeves praying that would solve the shape issues.
Which it did! I now have a dress of perfect proportions and one which is going to be in permanent rotation in my wardrobe until it literally falls off my back. Happy sunny weekend everyone!