This is a tale of two halves… so settle down comfortably kids and I’ll tell you a story. It begins as a little anecdote about my first ever pattern testing experience (the latest Sinclair Patterns Poesy blouse) but ends as a saga of what alternative options are available to a woman of ingenuity and desperation when quite literally all woven elastic within a 50 mile radius has been used up making face masks. Editors note: if 50 miles doesn’t actually sound too bad to you, include in your calculation the fact that I live on an island 9 miles by 5 with quite a lot of sea around it… 🙂
But let’s start with the straight forward bit – the top! For some time now I’ve been on the lookout for a simple woven top, but specifically wanted something with a slighty more feminine feel that the multitude of boxy tee patterns out there. So when the shout came out to test Sinclair Patterns Poesy blouse I was intrigued and shyly filled out the application.
And was rather chuffed to be picked! I know there’s a big debate in the sewing world about the ethics of sewing for free for designers, but speaking purely for myself, I fancied a chance at seeing how the design to production process worked, having maybe a bit of input into it and, let’s get to the nub of it, get the pattern for free and maybe get my pic on the website. I wouldn’t have volunteered if this hadn’t been a pattern I was fairly sure I was going to wear and the designer was one I’m a big fan of so I’m totally ok with what I had to do. Technically only one garment was asked of me – the 2 additional ones were totally of my own desire….

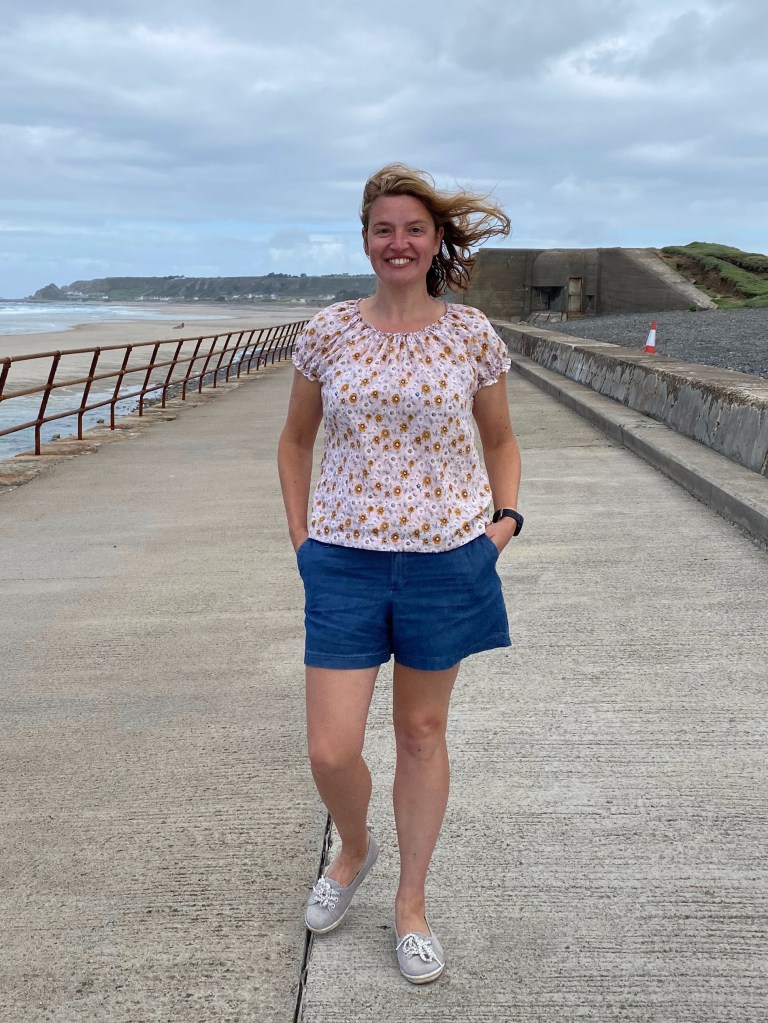
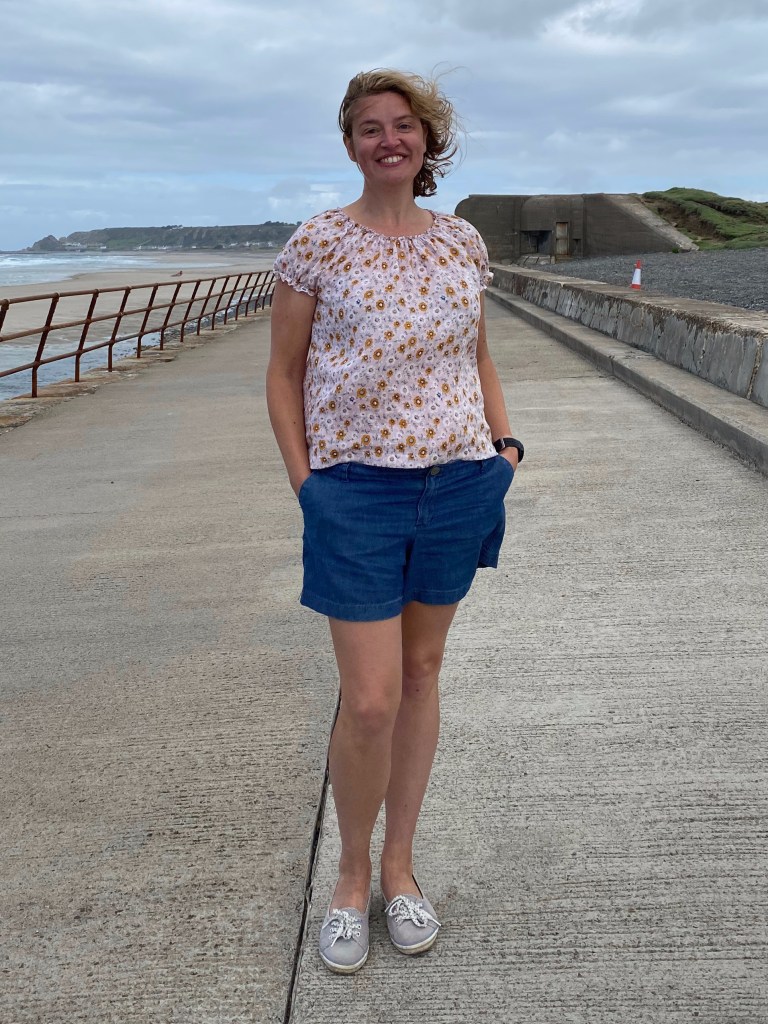
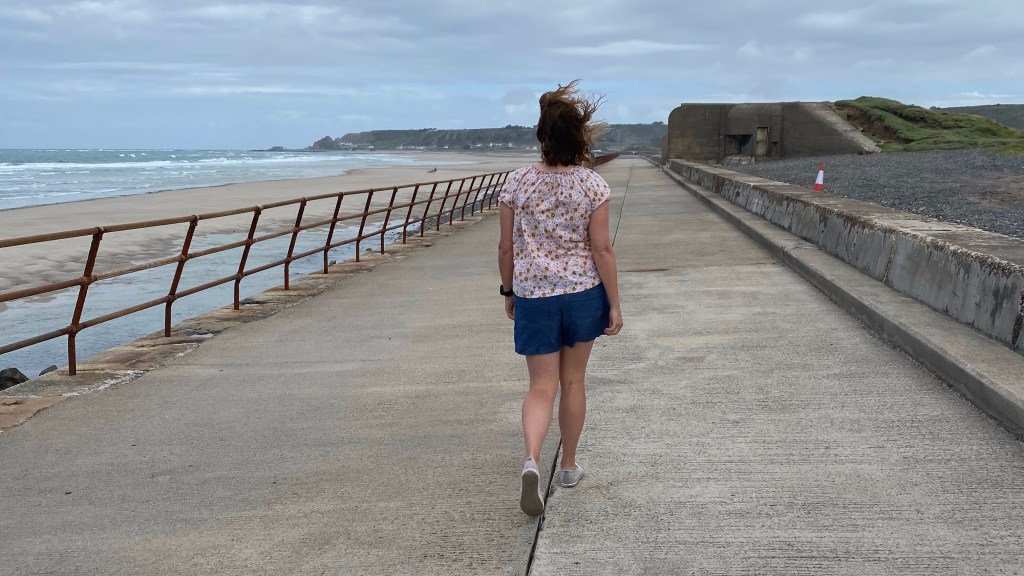
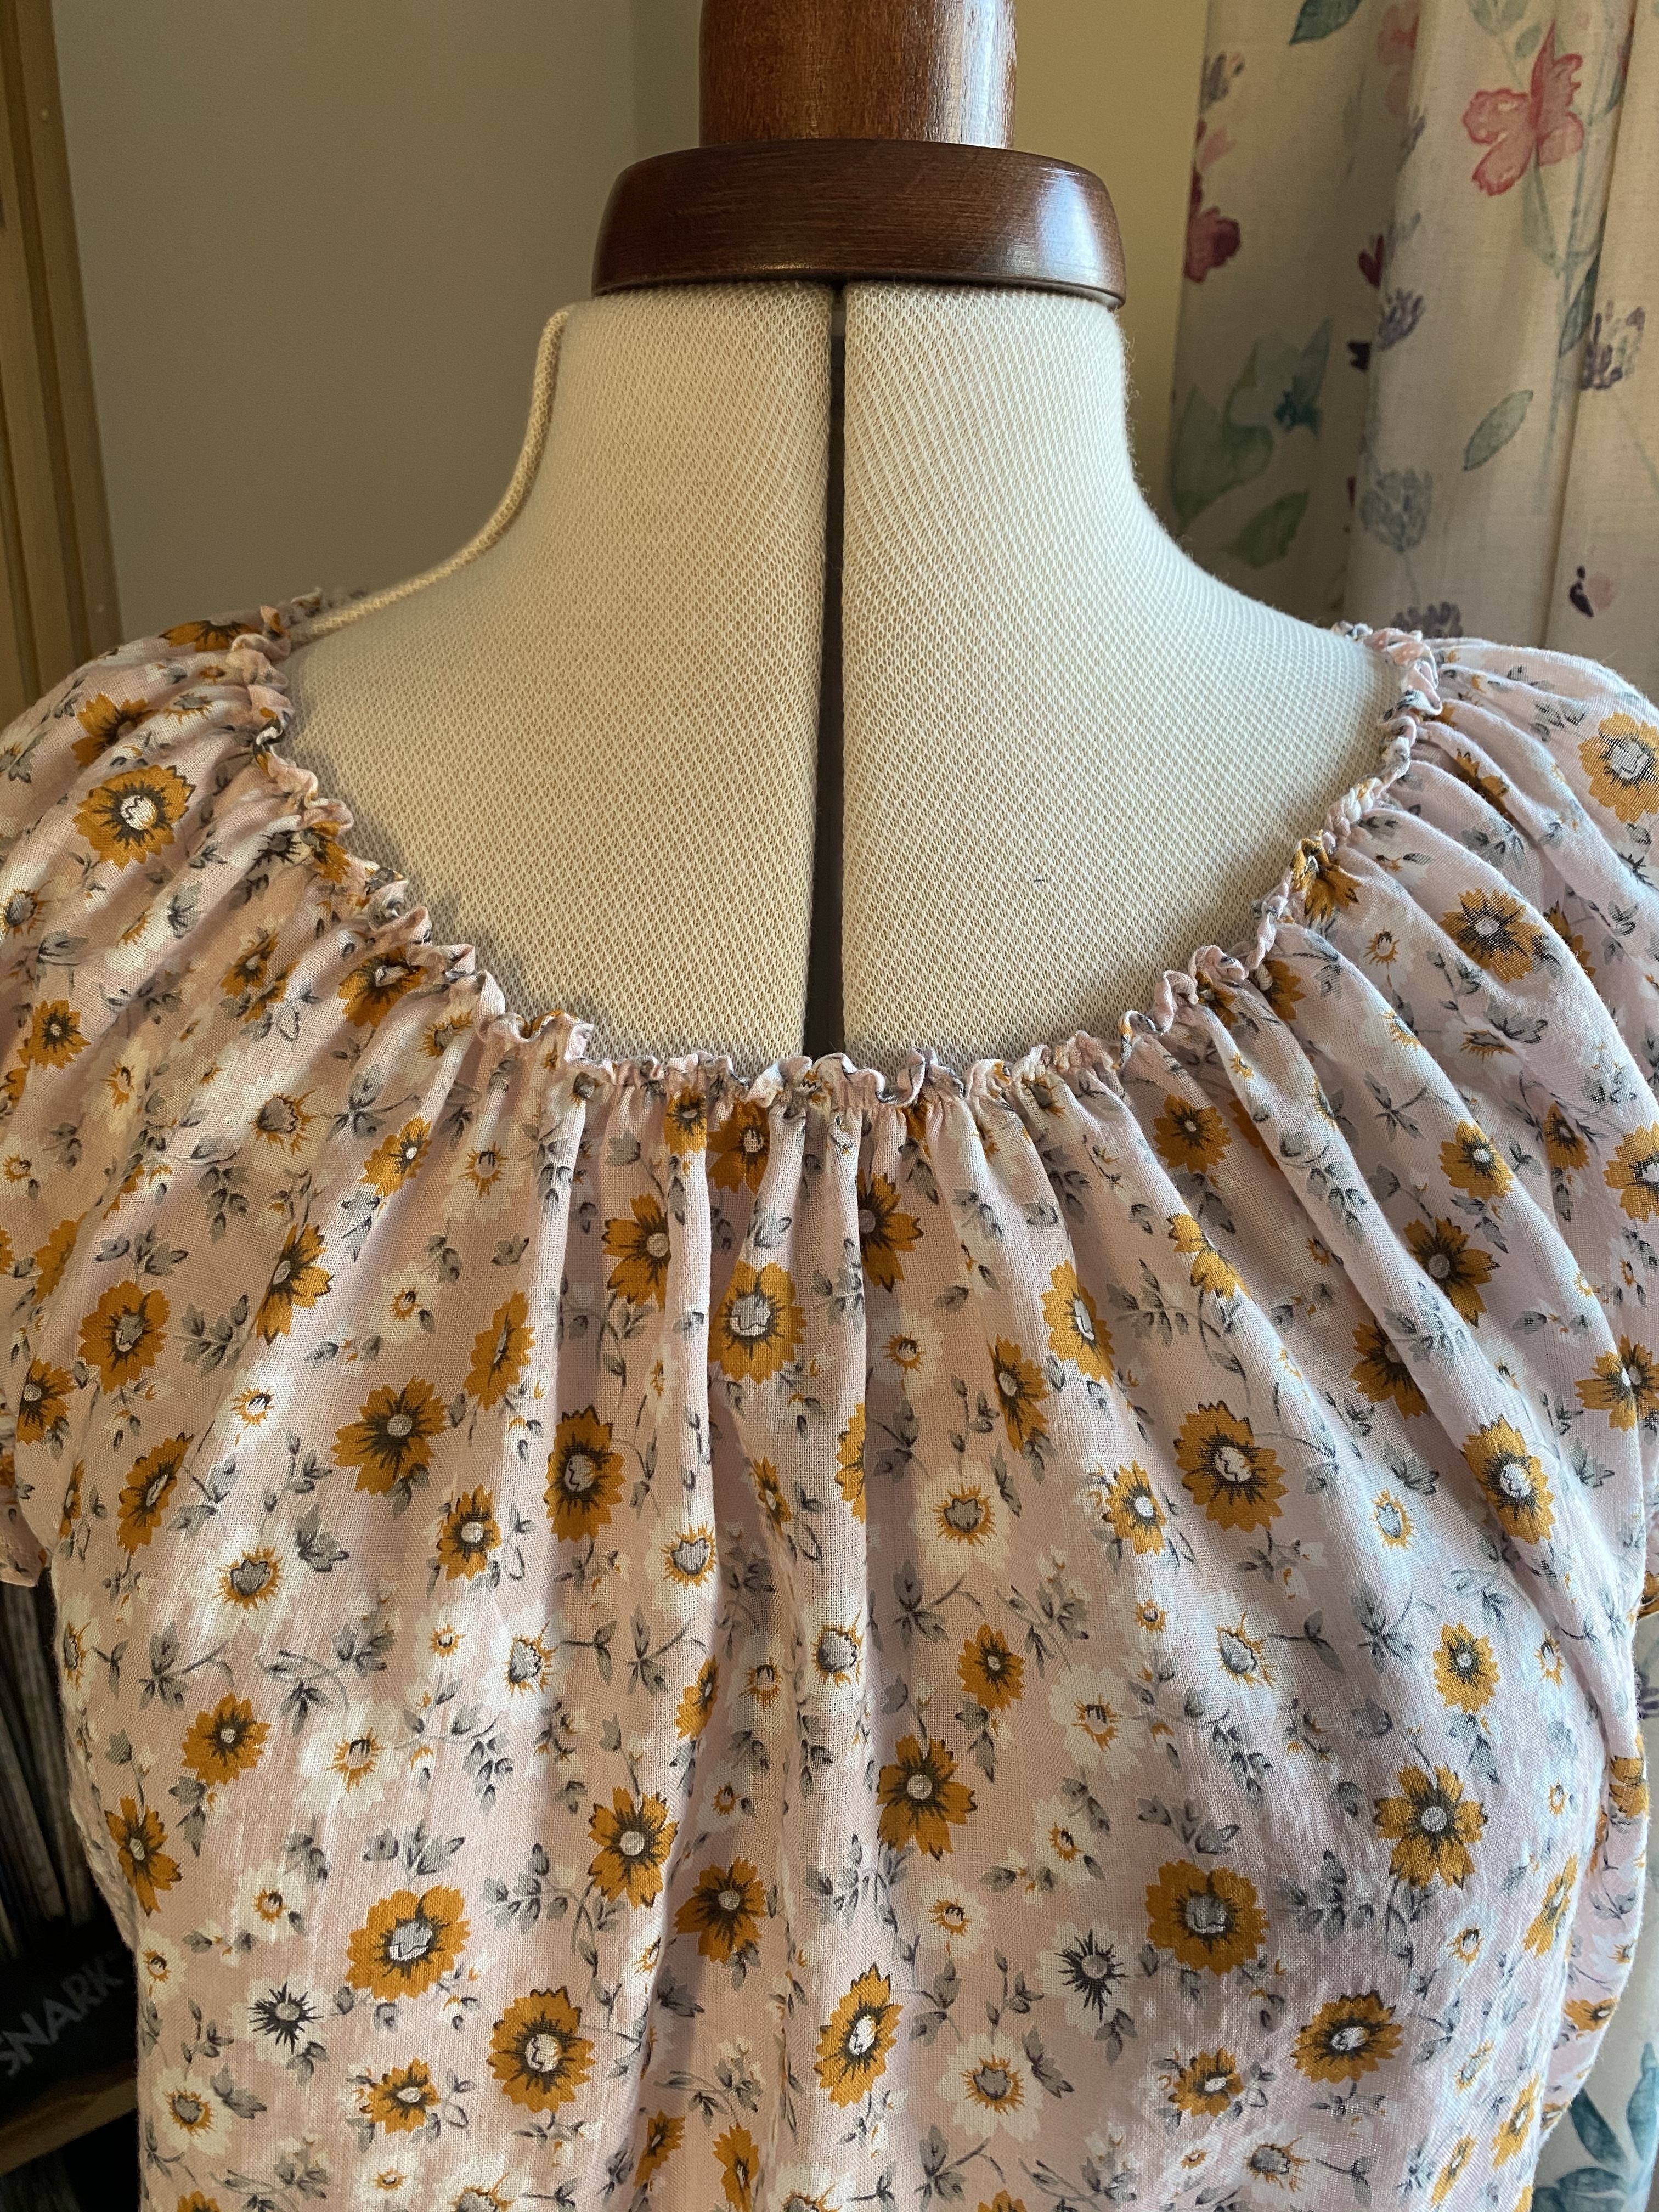
The poesy has a classic peasant blouse shape using elastic fed into a casing at the neckline and armholes to create the soft gathers. I was amazed how the neckline started off so big it looked ike a pillowcase, then magically came together at the last step to create a beautiful flattering shape. Also, speaking as someone who frequently has to do pesky narrow shoulder adjustments – fitting this was a dream! The length of the elastic for the armholes is determined simply by measuring your own biceps and then the pattern states the length for the neck elastic, but you are free to cinch it in or let out slightly to get the best possible shape across your shoulders and bust.
I cut a straight size US10 regular. If you’re not familiar with Sinclair Patterns they handily come in 3 height ranges. Techically I’m in the tall range being 5’8, but have a bizarrely short torso (I kid you not, sitting down I’m the same height as my 5’2 mother!) so I use their tall sizes for bottoms but stick with regular for the top half. And even that I like to skim a bit off. I shaved 1 inch off the hem for this dragon fly crepe version.
The only other alteration I made, or more strictly speaking didn’t make, was to the hips. Depending on my current cake-to-running ratio I’m a borderline 12 there, but the pattern has quite a bit of ease and I like a slim fit at the hips so I chose not to grade out. And I love how it hangs! I bought this mystery crepe in Denmark 3 years ago when I was sent there for work, it’s sheer and drapey but just on the decent side of opaque.
So now let’s talk about the supplies. If you’ve never pattern tested before (ooh get me, sounding like an old hand after doing it exactly one time!) you don’t get a lot of notice, so you’re pretty dependent on what you’ve got in your stash unless you live somewhere that has handy immediate access to haberdasheries i.e not an island. Which actually nobody had during lock down (real world – welcome to my world!). And these days, with everybody whipping up a storm of home made face masks, getting hold of regular plain old elastic is as difficult as obtaining toilet roll in March.
Which posed (poseyd??) a bit of a problem since I’d used up all my elastic stash making said masks for the neighbours… so it was time to get creative. First I assessed the available options:
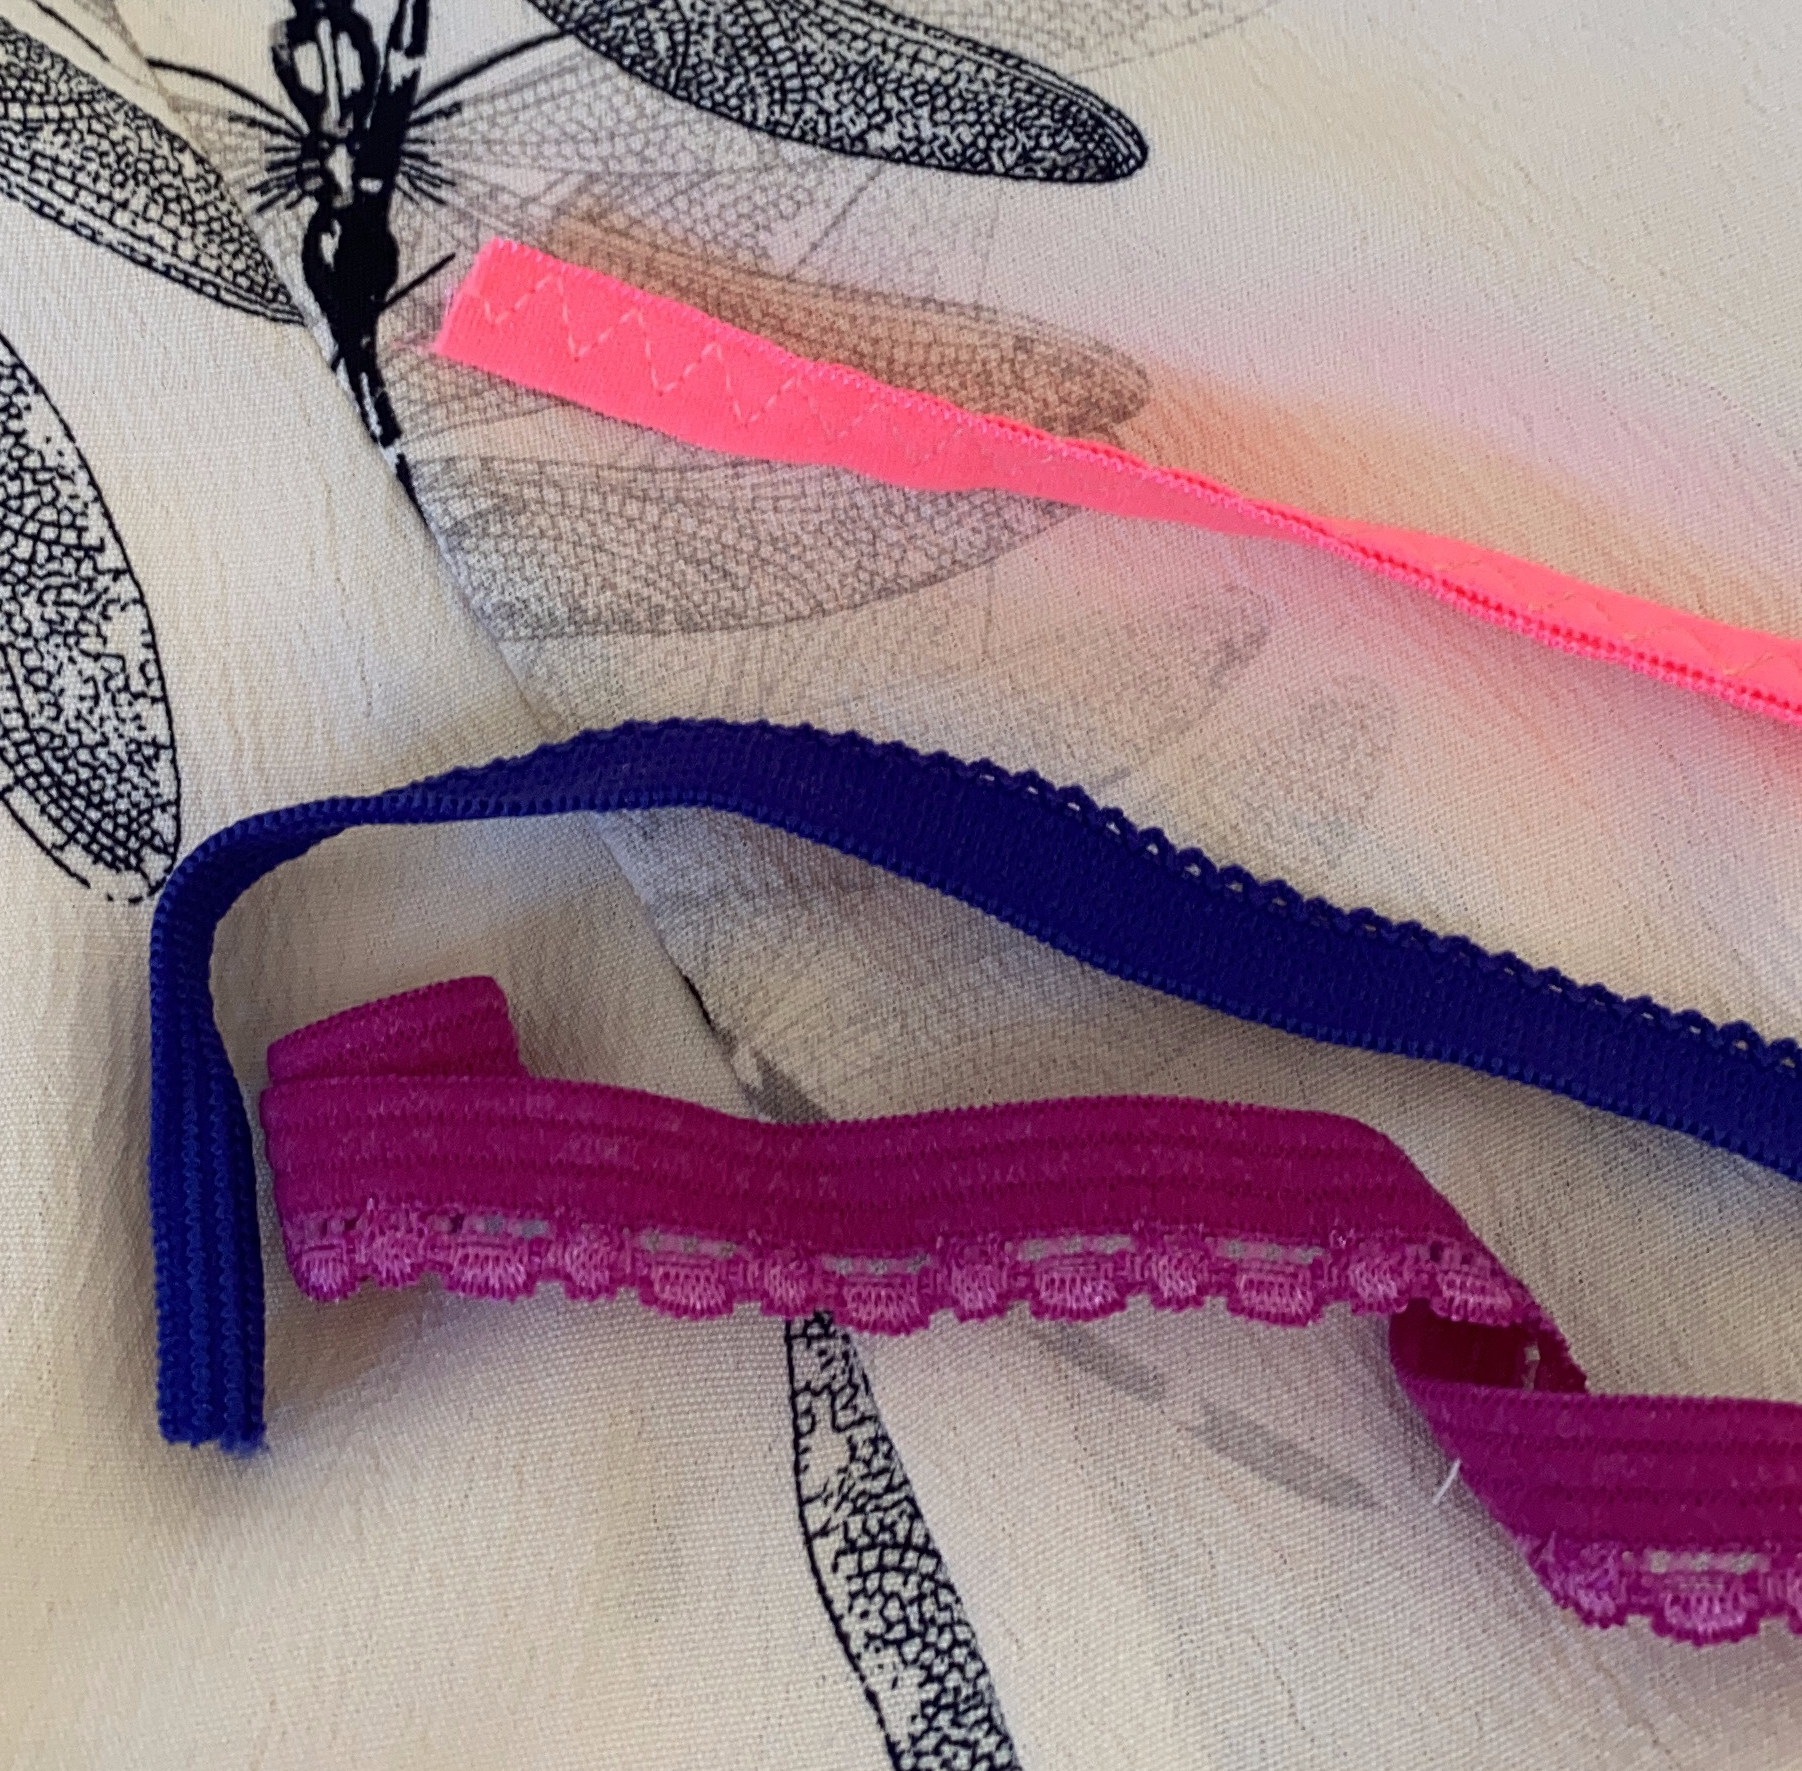
Yep you’re seeing it right. 2 lengths of lingerie elastic and 1 length of neon pink FOE. Even squinting optimistically whilst holding the elastic behind the fabric couldn’t disguise the fact that the colours shone through nice and brightly. Umm…. Further digging through the drawers unearthed just enough swim elastic for the neckline of the dragonfly top, happy days! Which still left the armholes. I eventually emerged from the depths of my wardrobe with a ribbed jersey camisole that shrank many years ago and if I’m honest, also isn’t as pure white as it was in its glory days. So I cut 1.5 inch strips horizontally across it, folded them lengthways by thirds (like you do with belt loops) and stitched them down with a zigzag stitch. Which made a reasonably stretchy narrow band, so I went ahead and threaded it into the armholes. Sadly the act of yanking it through the casing stretched all the stretch right out of it, so it sits slightly looser on my arms than the original intention, but with just enough gather to get away with it. I promised myself that as soon as I replenish my elastic stores I’ll take the camisole workaround out and put the real stuff in, but let’s face it, who really bothers themselves to go back to finished projects and fix them? The makeshift elastic seems likely to enjoy a long happy life in there.
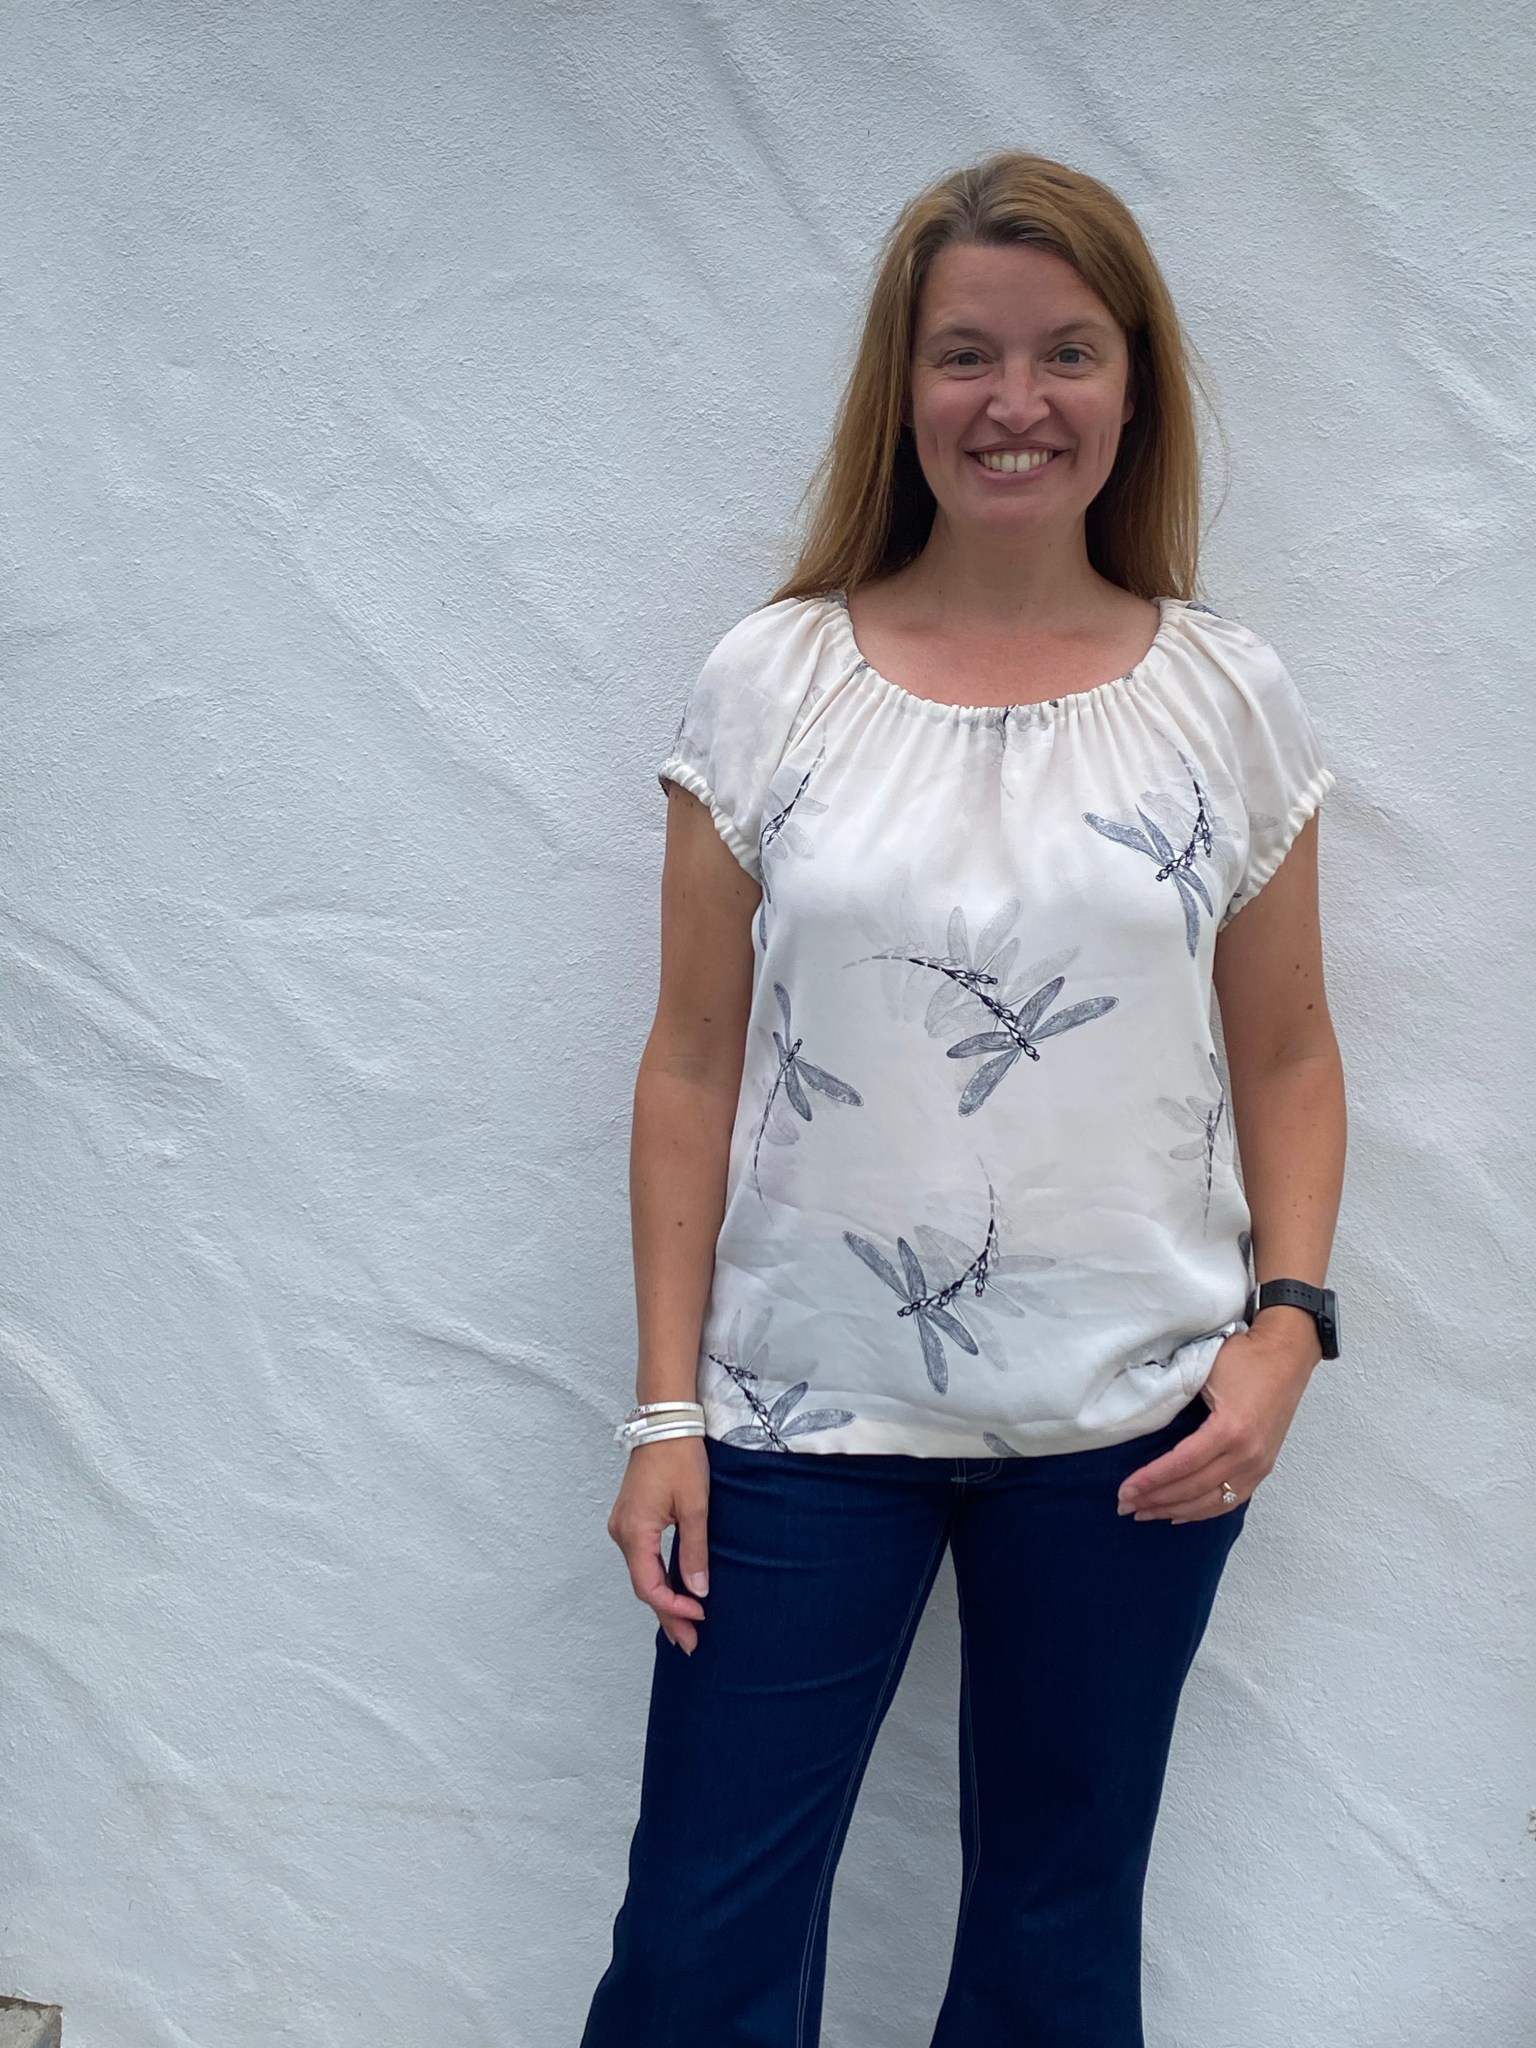
So… clearly having found a pattern that both suited me and fitted pretty much straight out of the pack, I wasn’t going to let a little thing like not having all the mandatory ingredients stop me from making more. (Also my approach to cooking!) For my second version I used a jade green crinkle gold dot double gauze I originally bought from Higgs and Higgs at the Knitting and Stiching Show at Ally Pally last year with the intention of making a festive top to wear to Christmas parties. I definitely suffer from eyes bigger than my sewing belly, so come May of the following year the fabric was still untouched. I only had 1 metre, but actually it turns out that’s plenty for the capped sleeve variation of this pattern. The gauze was prone to fraying, so I used french seams everywhere and staystitched the edges of the casings to protect them. I also took 2 inches from the bottom hem on this one since I figured the gold dots made it more of an “out out” top.

But I bet you’re all dying to know what I did for elastic! By now things were getting desperate, but luckily the green gauze was dark enough to hide any funky colours, including the neon pink FOE (can you see where this is going yet?) Inquisitve little me wondered what would happen if you just sewed the edges of the FOE together all along it’s length with a 3 step zigzag… turns out it works a treat! I ended up with a perfectly serviceable, if somewhat thicker than normal, length of elastic that threaded beautifully into my top.


Not content with stopping there, my mind was now running overdrive with all the possibilities – after all one of the other testers had retrieved the elastic from an old fitted sheet! (Total respect to the resourcefulness of that sewist by the way) Could I attach picot edge elastic to the blouse edges? Could I butcher any of my husband’s pants for their elastic? (Yuck) Could I use shirring elastic?
That last idea stuck fast… I’ve wanted to try shirring ever since I saw it on the Great British Sewing Bee a few seasons back and had a spool of shirring elastic in my stash that came in a mystery subscription box. Now was obviously the time to break it out! I did my research on shirring and hit Youtube heavily before picking a very lightweight cotton voile from my stash (bought from Oh Sew last year). I then finished the sleeve and neckline edges with a narrow rolled hem, hand wound 2 bobbins with the shirring elastic and piled up my offcuts to do some practice.
All the tutorials say you’ll need to sew a couple of lines before you begin to see the effect of the shirring… my machine thought “blow that for a game of soldiers” and proceeded to concertina my first offcut up to a teeny tiny little scrap. Apparently my machine luuurves shirring. I ended up having to do the exact opposite of all the advice on the web e.g. setting my stitch length really small instead of 3-4 and easing off the tension until I found the perfect settings for a loose gather. And even then I still dared only sew 2 lines of shirring for fear it would gather up too successfully and I’d never get it over my head.
But the effect is everything I’d hoped for! I’d really wanted to somehow give the gathered edges of the poesy a crisper look and putting the first line of shirring 1/2 inch away from the edge did just that. I added the second line in super close, just 1/4 inch away. I’d even be tempted in a future version to attach a teeny amount of delicate lace to the hem before shirring for the ultimate “pretty maid in the meadow” finish.

So there you have it! If the modern woman finds herself temporarily embarrassed in the elastic department she has many alternatives just lying around her. And I’d love to know if you can think of any others?
Thanks for reading!
Shelley